Intro to the Quick Access Panel Component
The Quick Access Panel Component Interface
This section provides a description of several features of the Quick Access Panel. Because this interface is typically used on a daily basis to manage the processing of applications, we recommend client system admins and general users become familiar with these features.
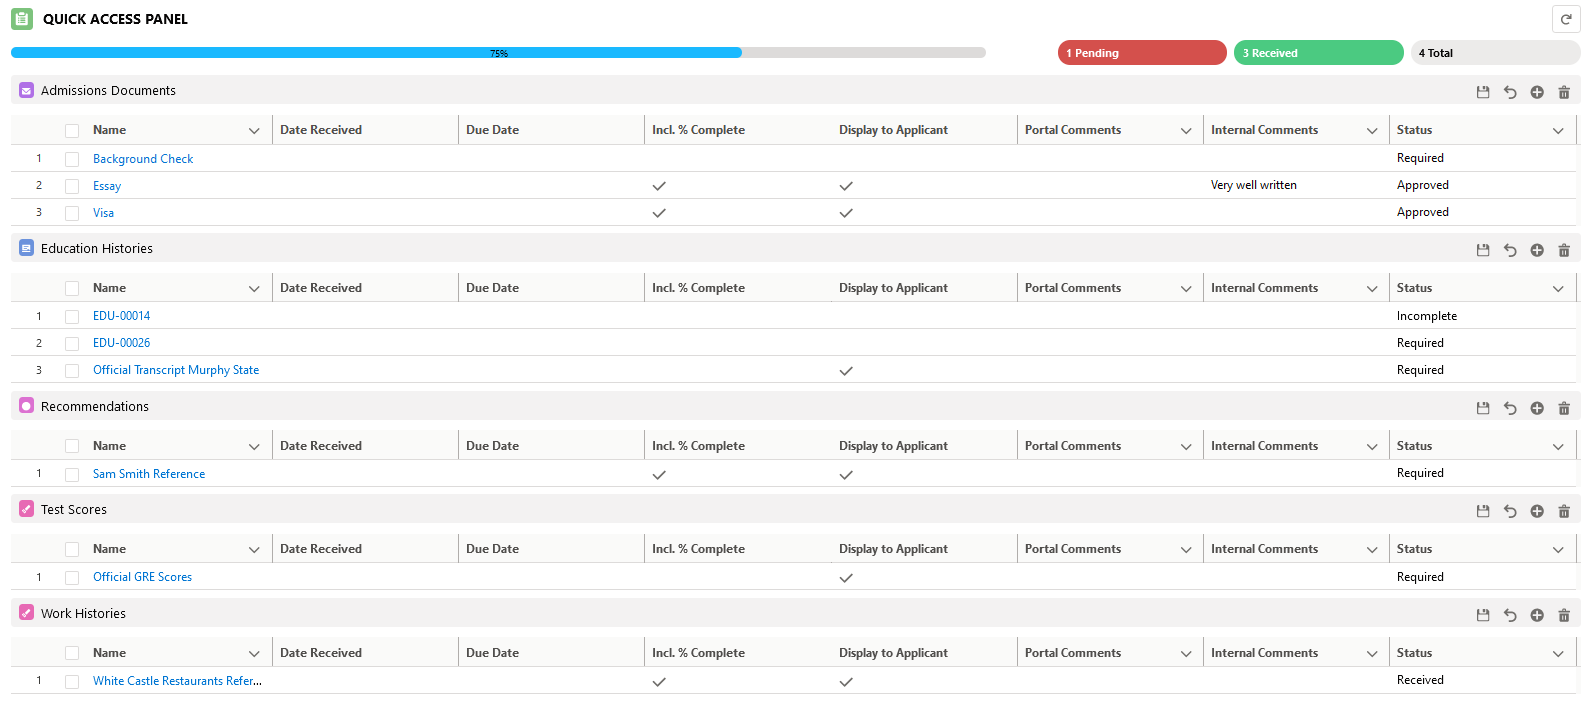
The % Completed Bar
Percent complete is displayed both as a graphic at the top of the Quick Access Panel,
and as a number populated into the field, Percent Complete on the
Application object.
% Completion is computed via the following formula:
(Received/Total)
Pending: All documents in which the Include in Percent
Complete field is checked, and "status" is one of the statuses selected
through Select Pending Statuses button on the Admin Panel.
Received: All documents in which the Include in Percent
Complete field is checked, and "status" is one of the statuses selected
through the Select Received Statuses button on the Admin Panel.
Total: The sum of the count of pending and received documents (i.e., all
documents in which the Include in Percent Complete field is
checked).
Display to Applicant field was used to
control which items count towards the percent complete calculation. More information
on this pre-Summer 2020 legacy behavior can be found in the Selective Percent Complete
section.Quick Access Panel Buttons for Each Requirement Item Object

| Button Label | Description |
|---|---|
| Save | You can update any of the fields displayed within the Quick Access
Panel. After doing so, you must click on the "Save" button ( ) to save your changes. You will lose your
changes if you exit the page before clicking the Save
button. ) to save your changes. You will lose your
changes if you exit the page before clicking the Save
button. |
| Undo | The “Undo” button ( )
will undo unsaved changes. )
will undo unsaved changes. |
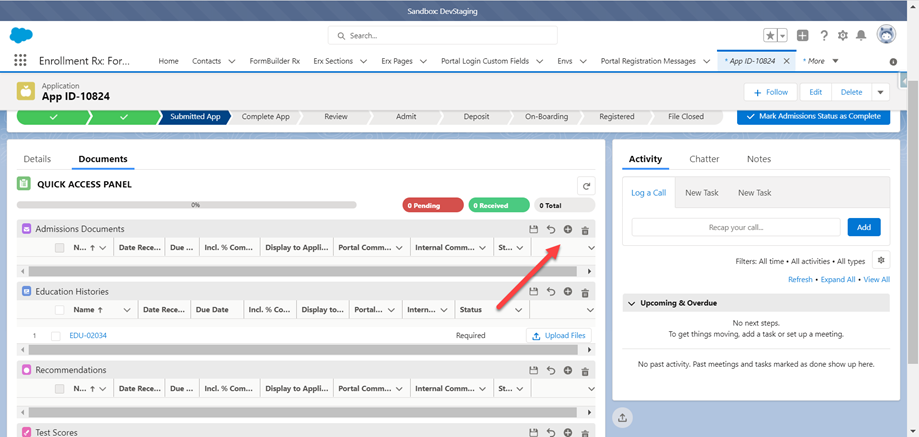
| New | The Quick Access Panel provides the ability to add new requirement item
documents to the Application. You can click on the “New” button ( ) to add new
documents. This opens a dialog like this: ) to add new
documents. This opens a dialog like this: 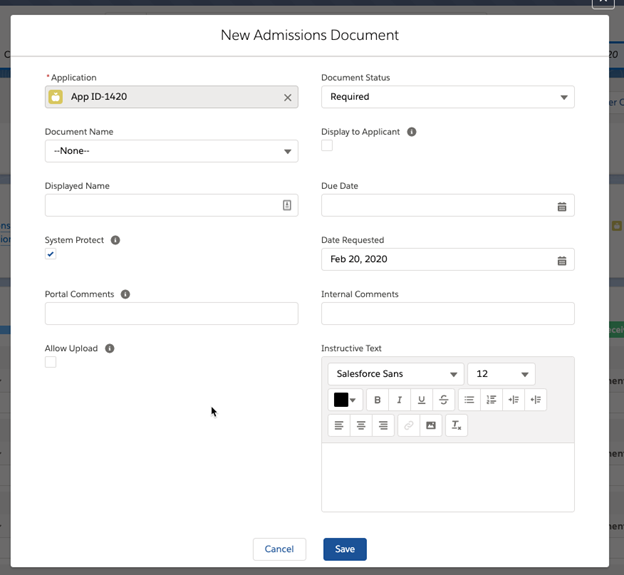 |
| Delete | To delete a record, check the checkbox to its left and click the "Delete"
button ( ). ). |
Manually Add a New Record
The QAP allows you to create a new document directly from within the panel. You can add a new record for any of the application Requirement Item Objects (by default these are Admissions Documents, Education History, Test Scores, and Recommendations). In the following example, a new admissions document is being created manually.
.
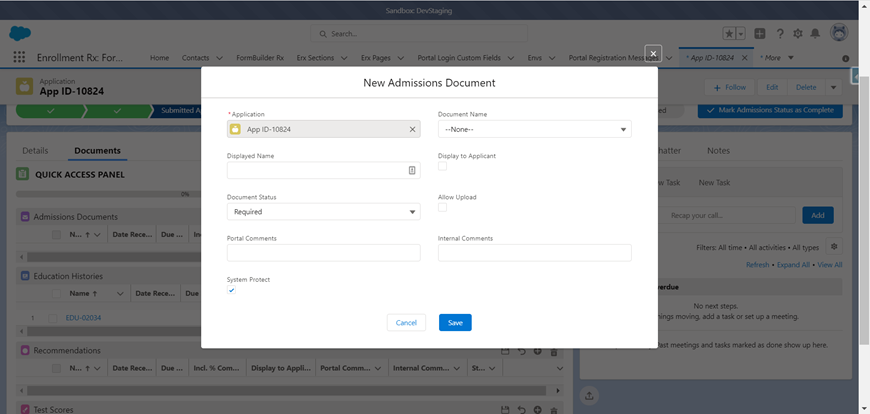
Fill out all the data required for the record, click the Save button, then the document will generate and display in the Quick Access Panel.
NewDocument which should exist on each Requirement Item Object.
The fields you put into this field set will appear in the dialog box when you click
the "new" button. Click here for instructions on creating the NewDocument field
set.